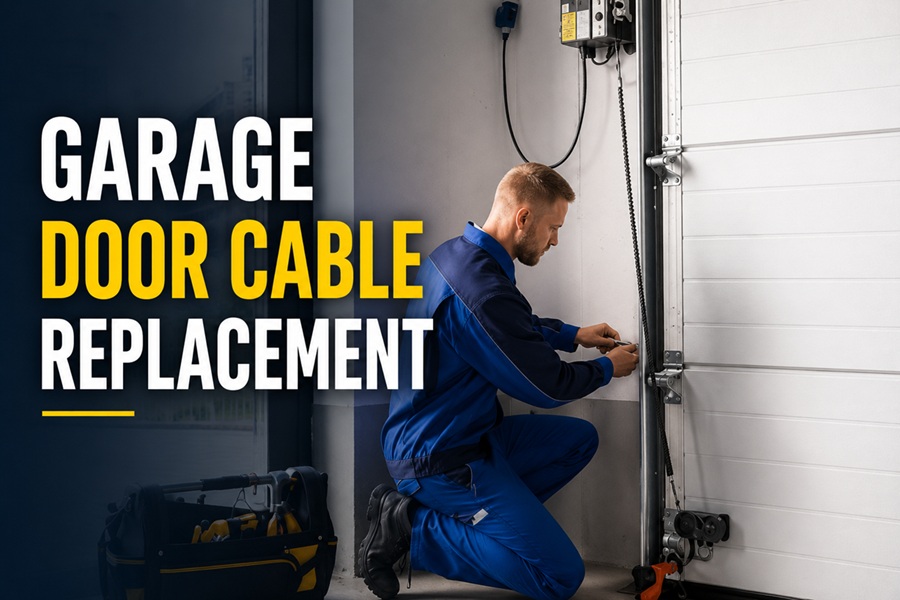
A frayed or snapped garage door cable is one of those repairs that looks intimidating but is very doable on the extension-spring type of door. In short: you replace a garage door cable by clamping the door in place, releasing spring tension, unhooking the worn cable from the bottom bracket, freeing it from the pulley or drum, and threading the new one along the exact same path before restoring tension. Most homeowners finish the job in one to two hours with basic hand tools.
Here is the part that matters most, though. If your door uses a torsion spring mounted on a shaft above the opening, the cables sit under enormous tension and a slip can cause serious injury. That version is worth handing to a professional. The walkthrough below tells you how to spot which system you have before you touch anything.
| Repair type | Garage door lift cable replacement |
| Difficulty | Moderate (extension spring) / Pro job (torsion spring) |
| Time needed | 1 to 2 hours for a DIY-friendly door |
| Typical DIY cost | $15 to $40 for a pair of cables |
| Professional cost | $150 to $250 including labour |
| Cable lifespan | Roughly 8 to 12 years with normal use |
| Best replaced | In pairs, even if only one has failed |
| Key safety note | Never unwind a torsion spring without proper winding bars |
What the Cable Actually Does
Your garage door weighs far more than it feels like when the opener glides it up. The springs carry most of that load, and the cables transfer the spring force to the bottom corners of the door so it rises evenly. When a cable snaps, the door often jams at an angle, drops on one side, or refuses to move at all.
There are two lift cables, one on each side. They run from the bottom bracket up to either a pulley (extension-spring doors) or a grooved drum near the top (torsion-spring doors). Knowing which of these you have decides the whole job.
Extension Spring or Torsion Spring? Check First
Look above and to the sides of the closed door. Long springs stretched along the horizontal tracks on each side mean an extension system. A single fat spring wound tightly around a metal bar directly above the door means a torsion system.
Extension-spring cable replacement is genuinely beginner-friendly because you can relax the springs simply by opening the door. Torsion cables stay loaded even when the door is up, and that stored energy is what makes them dangerous. The rest of this guide focuses on the extension type; for torsion doors, book a technician.
Tools and Materials You Will Need
- Replacement cables sized to your door height (buy the matching pair)
- Locking pliers or C-clamps to secure the door
- A sturdy stepladder
- Adjustable wrench and a socket set
- Work gloves and safety glasses
- A helper for the heavier moments (optional but welcome)
Step-by-Step: Replacing an Extension-Spring Cable
Open the Door Fully and Lock It
Raise the door all the way. With it open, the extension springs go slack, which removes tension from the cables. Clamp locking pliers onto the track just under a roller on both sides so the door cannot slide down while you work.
Disconnect the Opener
Pull the red emergency release cord so the trolley detaches. This keeps the motor from firing the door mid-repair.
Unhook the Old Cable
Follow the failed cable down to the bottom bracket at the corner of the door. The looped end sits on a peg or pin. Slip it off. Then trace the cable up to the pulley system and unthread it, noting the exact route it took.
Route the New Cable
Hook the new cable onto the bottom bracket peg first. Run it up over the pulley and back to the anchor point exactly the way the old one ran. A twisted or misrouted cable will bind and wear out fast.
Remove the Clamps and Test
Take off the locking pliers slowly and lower the door by hand. Watch both cables stay taut and seated. Reconnect the opener, then run the door up and down a couple of times, listening for scraping or uneven movement.
Torsion vs Extension at a Glance
| Feature | Extension Spring | Torsion Spring |
| Spring location | Along both side tracks | On a bar above the door |
| Tension when open | Released | Still loaded |
| DIY friendliness | Reasonable for beginners | Professional recommended |
| Special tools | Clamps and hand tools | Winding bars required |
| Injury risk | Low to moderate | High |
What Cable Replacement Costs
Doing it yourself is cheap since the cables themselves are inexpensive. Hiring out the labour is where the price climbs, and a technician will usually inspect the springs and rollers while there.
| Approach | Typical Cost | What It Covers |
| DIY (extension) | $15 to $40 | Cable pair only |
| Pro (extension) | $150 to $200 | Parts plus labour |
| Pro (torsion) | $200 to $250 | Parts, labour, tension work |
| Full hardware refresh | $250 to $400 | Cables, springs, rollers |
Signs a Cable Is About to Fail
- Visible fraying, rust, or broken strands along the cable
- The door hangs crooked or one corner sits lower
- Loud snapping or popping when the door moves
- The cable has slipped off its pulley or drum
- The door will not stay open on its own
When to Call a Professional
Hand the job over if you have a torsion setup, if both springs also look worn, or if the door is oversized and heavy. Cable and spring failures often travel together, and a pro can swap the whole lifting system in one visit, which is safer than fixing one part at a time.
How to Make New Cables Last
Wipe the cables and pulleys clean twice a year and check for early fraying. A light spray of garage-door lubricant on the rollers and hinges keeps everything moving smoothly, which reduces the strain on the cables. Avoid letting the door slam down, since repeated hard drops shorten cable life.
Why Cables Fail in the First Place
Cables rarely snap out of nowhere. Most failures trace back to slow, avoidable wear. Moisture is the biggest culprit, especially in garages near the coast or in regions with heavy road salt, because rust eats into the steel strands until they lose their strength. A door that is even slightly out of balance puts uneven load on one cable, so it frays years before its partner.
Misalignment matters too. If a cable rubs against a bracket edge or sits crooked on its pulley, the friction chews through the outer strands. And simple age plays its part, since the constant flexing of every open-and-close cycle slowly fatigues the metal. Spotting any of these early is the difference between a quick swap and a door that drops without warning.
Common Mistakes to Avoid
- Working on a torsion-spring door without winding bars, which is genuinely dangerous
- Forgetting to clamp the door, so it slides down mid-repair
- Buying cables of the wrong length for your door height
- Reusing a bent or rusted bottom bracket instead of inspecting it
- Routing the new cable differently from the old one, which causes binding
- Leaving the opener connected while you work
None of these are hard to avoid once you know about them. The clamps and the routing step are the two people skip most often, and both are worth double-checking before you call the job finished.
Testing and Balancing After the Swap
Once the new cable is on, do a quick balance test with the opener still disconnected. Lift the door halfway by hand and let go. A well-balanced door holds its position; if it slides up or drops, the spring tension needs adjusting, which affects how hard the cables work. Cycle the door slowly a few times and watch both cables stay snug on their pulleys. Only then reconnect the opener and run a full open-and-close.
Frequently Asked Questions
Can I use my garage door with a broken cable?
It is best not to. A door with one failed cable is unbalanced and can drop suddenly or damage the opener. Keep it closed until the cable is replaced.
Should I replace both cables at once?
Yes. Cables wear at a similar rate, so if one has given out the other is close behind. Replacing the pair saves you a second repair soon after.
How long does a garage door cable last?
Around eight to twelve years for an average household. Doors that cycle many times a day or sit in damp, salty air tend to wear faster.
Is a snapped cable an emergency?
It is not dangerous if you simply stop using the door, but you should not force it open or closed. Schedule the fix promptly so the imbalance does not strain other parts.
Final Thoughts
Replacing an extension-spring garage door cable is a satisfying weekend fix that saves a service call and teaches you how your door actually works. Take the door out of play, respect the tension, and route the new cable exactly like the old one. When a torsion spring is in the picture, though, there is no shame in calling a pro. The few hundred dollars buys real safety.